Tuesday, December 1, 2015

Our Green Christmas Tree

I know, I know. Miminalism and decluttering are the things to do at the moment. I can dig that. We just got rid of a mattress and a bookcase on Gumtree this week. We're into it. But it's not my religion. The classic minimalist aesthetic is not my cup of tea. I love Bea Johnson's work on bringing minimal waste to the mainstream, but there is no way I could live in a house like that! The inside of my bathtub has more character. And anyway, sometimes a bigger and better, new and improved thing doesn't have to be bad.

Introducing our new, relatively enormous CHRISTMAS TREE! It's beautiful, isn't it?


My little Quincey is 9 now. He is in the twilight years of his childhood and I want to make those years memorable and wonderful and warm. Will a new Christmas tree achieve that? No. But when we pulled the old one out of the bag and he said it looked scrawny and had probably shrunk since he was little and please could we get a new one, well, he did have a point. 

This is our first and until recently our only family Christmas tree. We got it in the UK in 1998 at
Poundland. Yes, for one pound. You have to gaffa tape the feet to the desired surface (or prop it up against the couch as pictured) for it to stay upright. It's shedding. It looks like an anorexic version of Oscar the Grouch. It's time.


So where do you head for a new Christmas Tree? Gumtree of course. Our new one was 15 minutes drive down the road. Perfect size. Pick up immediately. Cost $25. Bargain.

I was a little worried that we'd need more decorations to make our new one look good, but turns out we had enough with a few home made extras. An added feature of the new tree is the lack of fairy lights. We haven't had lights for years now and we still feel cheery when we gaze upon it. But I think that's because of the Angel Quin made in Kindy.


As for Oscar. I'm going to take him to work so he can brighten our days there. He's the perfect desk top size.

PS
I really think I'm on a winner here with the advent calendar situation. All the cards came in just one cardboard box wrapped in plastic. So not bad waste wise, and definitely better sugar wise!


Happy Festive Season everyone!

Wednesday, October 28, 2015

PV upgrade year 1 results

It's been a year since we upgraded our PV system. We re-roofed our house and I thought it would be good opportunity to review the pros and cons of upgrading. We had a 1.1kW Kaneka thinfilm system with a 1.7kW SMA inverter, with some room for more panels. We are lucky enough to be getting the 40 cents Feed in Tariff (FIT) on top of the miserly 8 cents Synergy pay us for any power fed to the grid. So, my main thought was what will our power bills be after the FIT ends in mid 2020? Based on the current power prices (+5% price rises) they actually worked out to be quite high, mainly because of the low price for power fed to the grid. It would be nice to think that common sense would prevail in this area (eg parity with prices we pay them), but I doubt this will happen any time soon. Anyway, I'm not a big fan of paying bills, especially thinking of the future when I'm retired. So we looked into an upgrade.

I got some quotes and advice on upgrading. It turns out you can keep the FIT as long as you keep your original inverter. It also turns out that you can overload most inverters and we decided to upgrade to a 3.1kW system. The panels are REC 260PE's, with six facing due North and six facing due West. Spreading them in two orientations means that we will also use more PV power in the home, which is best post FIT. The system cost $4,650 installed with new racking, etc. We were lucky enough to sell our old Kanekas for $900 to someone who wanted to expand his system and needed the same panels to be compatible with the existing ones. All up this took the price to $3,750. Here are the first year's data:


To sum it up we had a yearly bill of -$612 (credit), the Business as Usual (BAU) bill (ie no PV) would have been $630 so we saved $1,242. This makes the payback time roughly three years, after that we'll have three more years of FIT and then we'll still have small to negative bills for the next 25-40 years. Apart from the economics, getting more PV is better for the planet too. Remember, business as usual is not an option if we are to keep the planet from cooking...

Here's the N facing set:


And the West facing set (on the garage roof):


Overall we're chuffed with the new system. Comparing the old system's generation to the new one is interesting. Theoretically a 3.1kW Kaneka setup would have generated 11.9kWh/day (based on last 6 year's data) compared to the 9.7kWh of the new system (although our roof would not be large enough!). I think the reason for this is threefold. Firstly, I think there is something the experts call clipping happening. This is when the panels generate more power than the overloaded inverter can handle and some power is wasted. Secondly, the West facing panels would be generating less power than the North facing ones due to low morning generation. Thirdly, I think the Kaneka panels are better suited to Perth's heat and produce more power than mono and poly crystalline panels. I have seen this effect at our local Primary school where two systems side by side are located. The smaller thinfilm system (2kW) produces significantly more power than the larger (2.3kW) monocrystalline system.


That's all folks. Food for thought if you're in the same boat as us.

Saturday, October 24, 2015

Home grown chamomile tea

A miracle has happened in our garden. I know, another one! A chamomile plant self seeded in the veggie patch. I've been wanting to get one for a few years now but just never got round to it, so now ones got me. I asked google and facebook who have both confirmed that it is indeed a chamomile plant - probably a Roman Chamomile. It must have self seeded from my tea going into the compost.


It has cute little daisy flowers on a small shrub about a foot tall. If it is indeed a Roman it should be perennial, I'll take a few cuttings and see.

So to make tea, all you need to do is pick and dry the flowers (not the leaves or stalks). It's easiest to kind of rake them off the plant between your fingers. Do this when it's sunny and the flowers are dry. Ideally they should be at their peak, but if they are a little old, that's okay too. There are few things more satisfying in life than sitting in your own garden, picking your own tea.


I then dried them on paper towel under a net cover to keep off bugs and dust. (Not sure why I used paper towel, surely a clean cloth would work just as well).


Its taken a few weeks for them to dry and they look and taste amazing. The flavour is a lot stronger than the tea I buy in bulk but I think that must just be because it's so fresh.


The plant itself is wonderfully productive for such a little thing. I collect about enough to cover the large cake holder in the picture and I've harvested it four times and I suspect there will be much more to come! 

In the evening after Quin is in bed and the dishes are done we often share a little pot of chamomile tea together as our wind down ritual. It's something to chat over and relax with. And now this lovely little section of our day has just got better with the satisfaction of zero food mile, home grown tea!

Saturday, October 3, 2015

Fruit fly control

We had about 500 people visit us for Sustainable House Day and about 200 asked me about fruit fly control (mostly due to this article in the local paper).


Fruit fly are a huge problem in West Australia and many other parts of the world and people struggle to control them. These days few people want to use nasty chemicals which many commercial growers still use. People are also busy so they don't want time consuming methods. So, here's my solution: a chemical free, set and forget method I call 'Net and Forget'.

We have two types of fruit fly here, the Queensland and Mediterranean types. Here's an example of public enemy number one.


First things first. This method works best for stone fruit and apples, for citrus see lower down. The first thing you need to do is prune your tree to a maximum height of 2-2.5 metres. This makes everything you do on the tree easier: pruning, harvesting, pest and disease control, netting, etc. Fruit above 2.5m will rarely be harvested anyway and will fall to the ground and spoil. Using ladders is dangerous and not even I want to risk a fall for a few fruits. Fruit trees are very hardy so don't worry about hurting the tree when you prune. The best time of year is after fruiting in autumn.

So, now you've got your compact tree you can start on infrastructure.


You'll need the following:

Four 2m lengths of re-bar (steel reinforcing bar), 12mm gauge. Sold at your hardware store (cost $28).

Poly ethylene 25mm pipe, approximately 8-10m per tree. This is high density poly pipe which is strong and flexible. Sold as Vinidex PE pipe here in WA at hardware stores in the plumbing section (not retic). Costs $2/m in 25m rolls =$20/tree.

One nut and bolt larger than 50mm. Cost $2.

Fruit fly netting with 2mm mesh. These come in a variety of sizes and you'll need to measure your tree to find out the size you need. The best I've seen are from Green Harvest online, the 2.5 x 2.5m ones are great (cost $80). They're also sold locally at Dawson's and Bunnings.

Place the rebar half a metre into the ground so you have 1.5m protruding. These need to be placed around the tree in a square approximately 2m apart.

Then slot the PE pipe over one length of rebar and over to the other corner diagonally. Do this again with the other corners and you have a dome a bit like a tent.

Drill holes in the centre of the pipes to attach the pipes to each other with the nut and bolt.


This is your frame finished and you can leave it up all year if you want.


Then you throw the exclusion net over the frame and weigh it down at the bottom with some stones or branches. Now your tree is fully protected from fruit fly! You should put the netting on when all pollination has finished of course and do it soon since fruit fly can lay eggs when fruit is as small as a pea. When you've finished harvesting you should remove the net and store it ready for next year. Below is our apricot tree in the front garden.


If you think you may have fruit fly larvae in the soil under your tree place a trap inside the net for the first year, after that you should be OK. You can also do this for a week or so if you've trapped any flies inside your net. My favourite traps are Cera Traps and you can buy them locally at Dawson's or Bunnings or online at Green Harvest.

The cost of this system is hefty: up to $130 per tree. But the frame will last forever and the netting should last 5 years if you take care of it. So, over 20 years that's less than $20 a year. Think about the money you'll save on buying fruit too, how much do fresh organic apricots cost these days? Probably $20 a kilo, so if you get a kilo of apricots then you've made your money back.

One note: double grafted trees are not great for netting. One half often flowers at a different time to the other and it's very hard to net half a tree! For this reason I do not recommend buying multi graft stone fruits or apples.

A quick and easy method is to just buy the net and throw it over the tree canopy. Then tie it to the trunk and you're done. Any fruit which falls is caught by the net too. You will find that branches and leaves grow into the net and get distorted using this method.

What about citrus I hear you ask. Well, citrus are tricky because often you'll have flowers at the same time as mature fruit due to the slow ripening of citrus. This means you can't net them because pollinators need access to the flowers so you'll need to go for trapping. Again, I recommend Cera Trap, an organic and very effective type. Place a few of these around your garden for maximum effect. You can make your own traps with old plastic bottles with holes drilled into them and there are plenty of homemade trap recipes on the web.

Now, sit back and relax while your fruit ripen!

Monday, September 7, 2015

Sustainable House Day - We're OPEN!

For some strange reason we are opening our house for Sustainable House Day again this Sunday. It's a lot of work in preparation but we love it. We've opened before in 2011 and in 2013 and we remember the fun of chatting to people about gardening, PV, chooks and bikes all day. What a wonderful way to spend a day! What we tend to erase from our memory is the weekends full of weeding, planting, sweeping... but what the heck, I actually enjoy that kind of work anyway and our garden needs a good spring clean every few years so it's good motivation. We're exhibitionists, so we're just embracing it!

Looking through all the amazing houses that will be open this year I have stopped to wonder why we should open ours. Many of the other houses are new builds, all 100% solar  passive and 9 star rated. Their houses look like Ikea magazines (minus the disposable furniture I hope!) and are all neat and shiny. Our house, by comparison looks like granny knitted it, what with our fridge worm farm, our chooks and our scruffy native garden (yes, that is a knitted wheelbarrow below).


Our house is a 1960’s brick veneer house which provided many challenges to retrofit to be more sustainable and energy efficient. We are located on the south side of a hill with a beautiful gum tree to our north (which we can't bare to chop down) and to start with we had no north facing windows. So there is no way we would even be on the star rating scale. Since we bought the house in 2001 we’ve made heaps of changes. But the main change has been with us, as in, our behaviour.

We are firm believers in behaviour change as a significant part of the solution to our current environmental crisis. One of the most inspiring person I've met, Colin Ashton-Graham (a behaviour change economist) starts his presentation like this:

See these light globes? Tell me, which one uses the least amount of power.


And of course everyone votes for either the LEDs or the CFLs and Colin goes, 'Sorry folks, the one that uses the least amount of power is the incandescent globe. It's the only one that is switched off.' Ha! That's how clever Colin is! He then goes on to explain that a sustainable house with unsustainable people in it is less sustainable overall than an unsustainable house with sustainable people in it. Our everyday choices like turning lights off when not needed, opening up the house to let in cool sea breezes in summer, only having one fridge, cooking more at home with local, organic produce, riding more, getting into community and purchasing less crap are central to sustainability. Having the latest sustainability gadget isn't really our thing (unless its bikes, that's Adam's weakness!).

So, while we do have some interesting stuff to show, especially our garden, we also hope the behaviour stuff will rub off too. Anyway, come and visit. We're open from 10am to 4pm this Sunday, September 13 - be lovely to meet you!


Tuesday, July 28, 2015

How to make bees wax sandwich wraps; no more glad wrap!

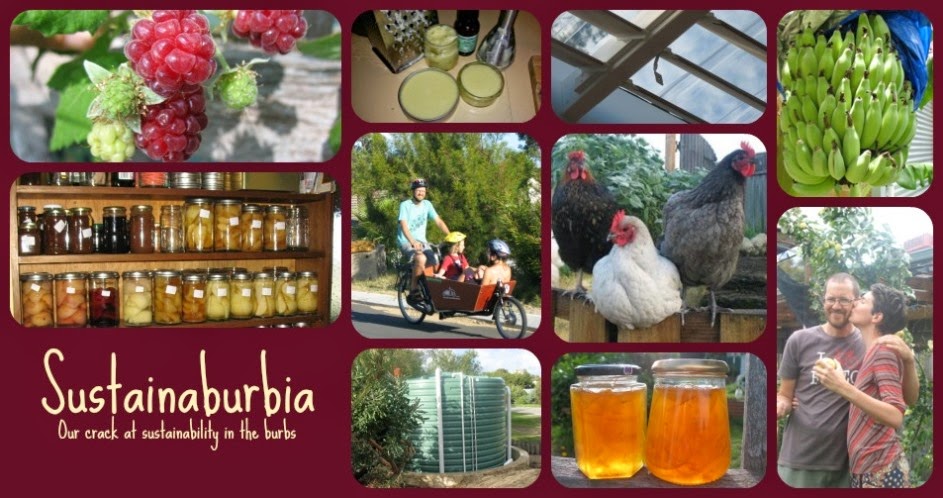
So here is the promised 'how to make a bees wax sandwich wrap' post!

These are so simple to make, we even did a Make Your Own stall at our local farmers market (to be the subject of another post). I've been using my sandwich wrap for about eight months and it's still going strong. I love them so much I also made some larger ones to use for wrapping my loaf of bread and also storing lettuce, celery etc in the fridge to stop them going limp - you know it's true, plastic does keep veggies fresher, but now there is an alternative!

You will need:
Cotton fabric approx 30 x 30cm. This is a good size for wrapping sandwiches but of course you can make them bigger if you like. 

Pinking shears. It's cute to use pinking shears to make the edges zig zag but not 100% necessary because the wax will stop it fraying.

Bees wax. If you have access to a hive you can refine your own but if not you can often get it from farmers markets or online. 

Cheese grater. You can use your good one and once you've finished grating the wax clean it by pouring boiling water over it. You might need to do this a few times.

Iron. Best to find an old iron from an opshop but you can use your good iron by covering it in alfoil.

Old towel to iron on. I think this is better than an ironing board so you can spread your gear out. 

Baking paper.

Method:
Grate your wax. This is pretty time consuming but easy. It looks like parmesan cheese once grated and is endlessly fondle-able. You'll need about 1/2 cup grated wax for one 30 x 30cm wrap, but less as you make subsequent ones because there will be residue left on the baking paper. 


Cover your iron with two layers of alfoil if you're using your good iron. Lay out your towels on a table for ironing on. Lay out your baking paper - you will probably need to overlap two sheets to make it wide enough for the fabric.


Cut out your fabric - here are the students cutting them at school. You can get some fantastic prints from fabric shops or if you want to be super sustainable you can cut up old shirts, bed sheets etc.


Lay your fabric on the baking paper and sprinkle on the grated wax just like sprinkling cheese on a pizza. 


Then lay over another layer of baking paper - again, you will need to overlap two pieces. Then get busy with the iron. It takes a little work to get it all melted and you have to be sure to sweep the iron from the centre to the edges to get the wax pushed out to the edges. You can see it going all melty under the paper so its pretty easy to judge how you're going.


Once it's all covered and while its still hot peel back the top layer of baking paper and then peel off the fabric by the corners. Its good to have a helper at this stage to hold down the bottom layer of baking paper. It takes about a minute for the wax to dry, so you can just wave it around for that long or place it on a clothes airer.

And this is the final product! The bees wax has anti bacterial properties which I really like and they smell great! To clean them simply lay them out and wipe with luke warm soapy water - not hot or the wax will melt again. I haven't tried but my eight month old wrap is looking a little sad now but I suspect if I ironed it again between the baking paper it would come back to its former glory.


Here we are making them at Hilton Primary School with the year 5/6 class. It really was such fun. The teacher had the kids working on other maths activities and we took three students at a time to the back of the class and made them. It took a couple of hours, but that's because lots of the kids loved them so much they stayed in at lunch time to make extras for their friends and family.


Lat weekend we did a second big event with a Hilton Primary School P&C stall at the local farmers market. We had four parents and three students helpers and we made about 70 wraps. I'll write a separate post about how to do that as a big event just in case you're as inspired as I am to cut the plastic AND get everyone else around you to too!


Friday, July 24, 2015

Chooks paying their way

The chooks are finally paying their own way. We have started to sell our eggs to friends and colleagues for $6 a dozen. We are selling 1-2 dozen a week now so this easily covers their food and hay costs and should pay for the next lot of hens too.


Towards the end of last year we had 4 chooks laying an average of 1 egg a day (total of 7 eggs a week). We took the hard decision to cull the lot and we got 4 Hi-Line browns and two Australorps. They settled in well, with the browns laying straight away and the Australorps being a bit slower to get laying. We are now getting about 40 eggs a week and the chooks are thriving.


One thing that has changed is that we helped our northerly neighbour to prune her Lily Pily tree and this has let lots more sunlight into the pen. This is a big help in winter when the sun angle is lower but won't affect the amount of shade they get in summer.


We're now considering buying 2 new chooks so we can do succession planning better next time around. Who says it doesn't pay to be green?

Saturday, July 4, 2015

How to refine Bee's Wax; from sticky mess to clean and usable

I'm really into bees wax at the moment. It smells beautiful. It feels so interesting. I can't stop touching it. If you have a chew on the unrefined honeycomb it tastes like honey. Mmmm. It's one of natures miracle products.


My friends at Ecoburbia have hives and after they do a honey harvest they have bucket loads of honeycomb wax left over. Another friend learnt how to refine it and she had been giving me her wax to make lip balm and hand cream. You hardly need any bees wax for these recipes, but then I learned how to make sandwich wraps with bees wax (which will be the subject of my next post), for which you need a fair chunk of refined wax. So I decided I needed to learn how to refine it myself. And I'm so glad I did. Turning a sticky, dirty, mess (bees apparently do not wipe their feet when they go home to their hive) into something amazing and useful is such fun! So here's how to do it.

First you need some gear from the op-shop. You wont be able to use your wax refining pots for food again, it gets too messy. You need a big stock pot, a smaller pot and a bowl to fit in the small pot for double boiling, a sieve, some fabric and some silicone moulds (actually I use these for cooking too). 

Take your bucket of sticky honeycomb, complete with dirt, honey, dead bees, sticks and whatever else you find and plonk it all in a big stock pot filled with water. 


Stir it and bring it to a hard boil for about 10 minutes or so. This dissolves all the honey and loosens the other debris from the wax. 


Let it cool in the pot. I usually leave it over night. The wax floats to the top and the honey and much of the dirt is left in the water. When the wax cools and sets you end up with a disk of wax with all the remaining grainy debris on one side of it, sadly this often includes the bees too. Take out the disk and just pour the water away. 


Then you simply cut off the grainy edge with a sharp knife, break up the cleaner bits and then double boil it to melt it again.


Once its all nicely melted in the bowl, pour it into the silicone moulds through a sieve lined with muslin or cheesecloth to catch the very fine bits of debris in the wax. I haven't found a way to clean the cloth and use again but somehow we always seem to have some kind of fabric around the house to use.


Let it cool for a 10 minutes or so then pop them out of the mould. And that's it. Beautiful, clean refined bees wax ready for further uses. And yes, I'll be sharing some of those other uses soon.

Thursday, June 18, 2015

Look what I found just around the corner

I went for an amazing and beautiful bushwalk the other day. Even though we are at the start of winter we saw some gorgeous and delicate wildflowers - Calatryix (the pink star flower), Hovias (the purple pea flower), sun dew flowers and more.

 Plus, of course, the robust and unique Mensies Banskias, or Firewood Banksias and this particularly massive Australian Christmas Tree and this awesome Golden Orb Spider. I know the bush is this beautiful but what I didn't know was that this particular bit of bush it was hidden just around the corner from my place. 


The walk was hosted by the lovely Kate Kelly from Save Beeliar Wetlands who is passionate about our local bush and thinks it's rather a mistake to plough a six lane highway through it. Our idyllic one and a half hour walk was the route of the proposed Roe 8 highway, a part of the Perth Freight Link. According to the Rethink the Link mob:

'The Perth Freight Link is a $1.6 billion, 13 km 6-lane heavy vehicle freeway that will divide suburbs and destroy ecologically sensitive land.'

Kate reckons around 96 ha of this kind of bush will be destroyed and will result in keeping about 10% of trucks of our suburban roads. For a while. Until the Fremantle Port reaches its capacity, which it nearly has. The message the Rethink the Link group is putting out is that the freight can go on rail and the Outer Harbour in Kwinana Port, which is planned for, should be built asap. 

Everyone knows that more roads equals more congestion. Roads are not the way of the future. They are from the olden days when we all wanted to hunker down in our individual quarter acre block and drive our gas guzzeling individual death traps of cars around so we didn't have to see, hear or know the existence of our neighbours. We didn't realize the effect this was having on our collective psyche or our health or the health of the planet. We now know cars suck. What we really want is fewer roads so we get to crisis gridlock on the roads then those able bodied among us can get on our bikes, breath clean air, be healthy and connected to community again. That, my friends, is the way of the future. I wrote to Mr Barnett to express my views. Here's my letter:

Dear Mr Barnett,

I'm writing to express my deep concerns about the Perth Freight Link project. The project will not have the effect the government wants, at $1.6 billion it will be expensive and come at the cost of our precious urban wetlands and the connectedness of our community.

This project is poor urban planning and will devastate communities who live beside the the new road. It will slice us in half. Big roads are not conducive to parents walking with prams, kids riding to school or bike riders. No-one wants to live in a city where the only way to get around is by car.

My family enjoy visiting the Beeliar wetlands often on weekends. We ride our bikes around the lake and enjoy spotting swans, snakes and even occasionally long neck turtles. PLEASE don't destroy this. It's a rare and beautiful piece of wilderness right by our back door. The same is true of the corridor of bush that had been set aside for the road. When Roe 8 was planned decades ago I'm sure we didn't know how precious our remnants of bush would be amongst our current landscape of urban sprawl. Don't squander it for the sake of a road, the world does not need more roads, it needs trees and bush. Every remnant is precious.

I am also concerned about the effect of more trucks on the roads and the pollution they will bring us. Research shows that more roads only means more traffic. Thankfully there is a solution which is to rebuild and incentivise the use of rail for cargo to and from the port of Fremantle.

I suspect the government is severely underestimating the community opposition to the Perth Freight Link. People have been working on this campaign for decades and there is no sign their determination is dwindling. Please do not be arrogant. Listen to us. We don't want it. We don't need it. We can't afford it. The last thing this world needs is a new road.

Yours etc


It was satisfying to write.


Monday, May 25, 2015

A sustainable wedding

Well, after 18 years of being boyfriend/girlfriend/partners Amy and I finally tied the knot. It was a great day and of course we tried to give it as low a footprint as possible.


The biggest factor in this is probably travel. We certainly didn't want people flying to Bali or Costa Rica just for our big day due to the air miles. So, we went ultra local: in our back yard! It just made sense for us, we love our home and garden, we have the space and it made it lower stress as well. We could set it up as we wanted, not having to rely on other people to do things like waste management, decorations, etc. Sure, it made a bit more work for us but Amy and I had time off work to do this. In the end two people out of seventy flew to the wedding and everyone else drove or rode a few kms.

We borrowed almost all the plates, cutlery, etc from Amy's parents church. We also borrowed chairs, tablecloths, cushions, lighting and more from friends and family. No plastic involved there and no cost. Amy made decorations, lots of beautiful bunting.


We paid some great local artists help out with photography, dress making, catering and music and we even had our friend Tim from Sand Sculpture WA to build us a sand sculpture as a wedding present to us.


With waste we put all the organic waste to the chooks or compost bins. All recyclables fit into one yellow Sulo bin. This was mainly bottles (wine and beer). We considered getting a keg of beer but in the end we didn't think we'd get through 50 litres and a lot would get wasted. This turned out to be true since we only used about 20 litres in the end. Most of the beer and wine was from WA, some from over east.


The flowers were flown in at great expense from the front garden (Banksia menzeisii and prionotes). Amy's dress was made from an old table cloth and she didn't buy new shoes or a tiara! The food was all vegetarian, made from mostly local and some organic produce. We even managed to use some of our own produce: home dried cherry tomatoes and pickled olives.


The power was 100% renewable, either from our solar panels or from Synergy's natural power. The water came from the rain water tank.

We had a great time and definitely recommend backyard weddings if you have the time and space.