Tuesday, September 30, 2014

Home made hand cream for a beautiful midwife

My sister is a beautiful soul and has been a role model for me throughout my life. She was with me when Quincey was born and was such a source of strength and comfort for me - then and at when ever I've needed her. I don't know what I would have done without her at times. Now though, its my turn to help her as she is returning to work after several years off with her own young kids. My sister is a midwife and to be sure, the best sort of midwife you could hope for - calm, non-judgmental, reassuring, honest and skilled.

She is also very good on general hygiene, ie washing her hands at work and has really dry skin now, so I made her some home made hand cream. My friend made some for me recently and I just love it! Its Creme Galen Cold Cream and according to the recipe was created by the Roman doctor Aurelius Galenus (AD 129 - 217).


5 oz rose water
1 oz unbleached beeswax
6 oz extra virgin olive oil
8 drops rose essential oil

Grate the bees wax. Gently heat the rose water in a glass bowl in a hot water bath. In a separate bowl combine the beeswax and oil and then gently heat until liquid. Remove both bowls from heat and slowly pour the rose water into the oil and wax blend. Mix with a stick blender until combined. Add the essential oil and stir. Before the liquid cools and sets, pour into clean small jars or tins.


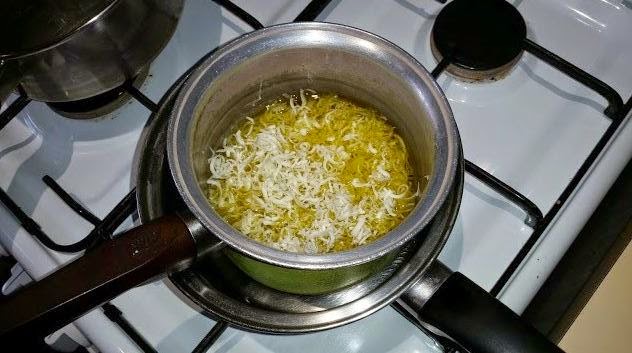
It was particularly satisfying making this because I used bees wax from a friends backyard hive and olive oil from our last Great Hilton Harvest Olive Pressing. Okay, the rose water was from Syria and I'm not sure about the rose oil.

I use the cream at night as it is quite heavy and makes my skin shiny. In the morning I just slash my face with water and away I go. I use it on my hands, legs and face. I don't understand why people need a hand cream, a face cream and a body cream. Last time I checked my face and hands were a part of my body!
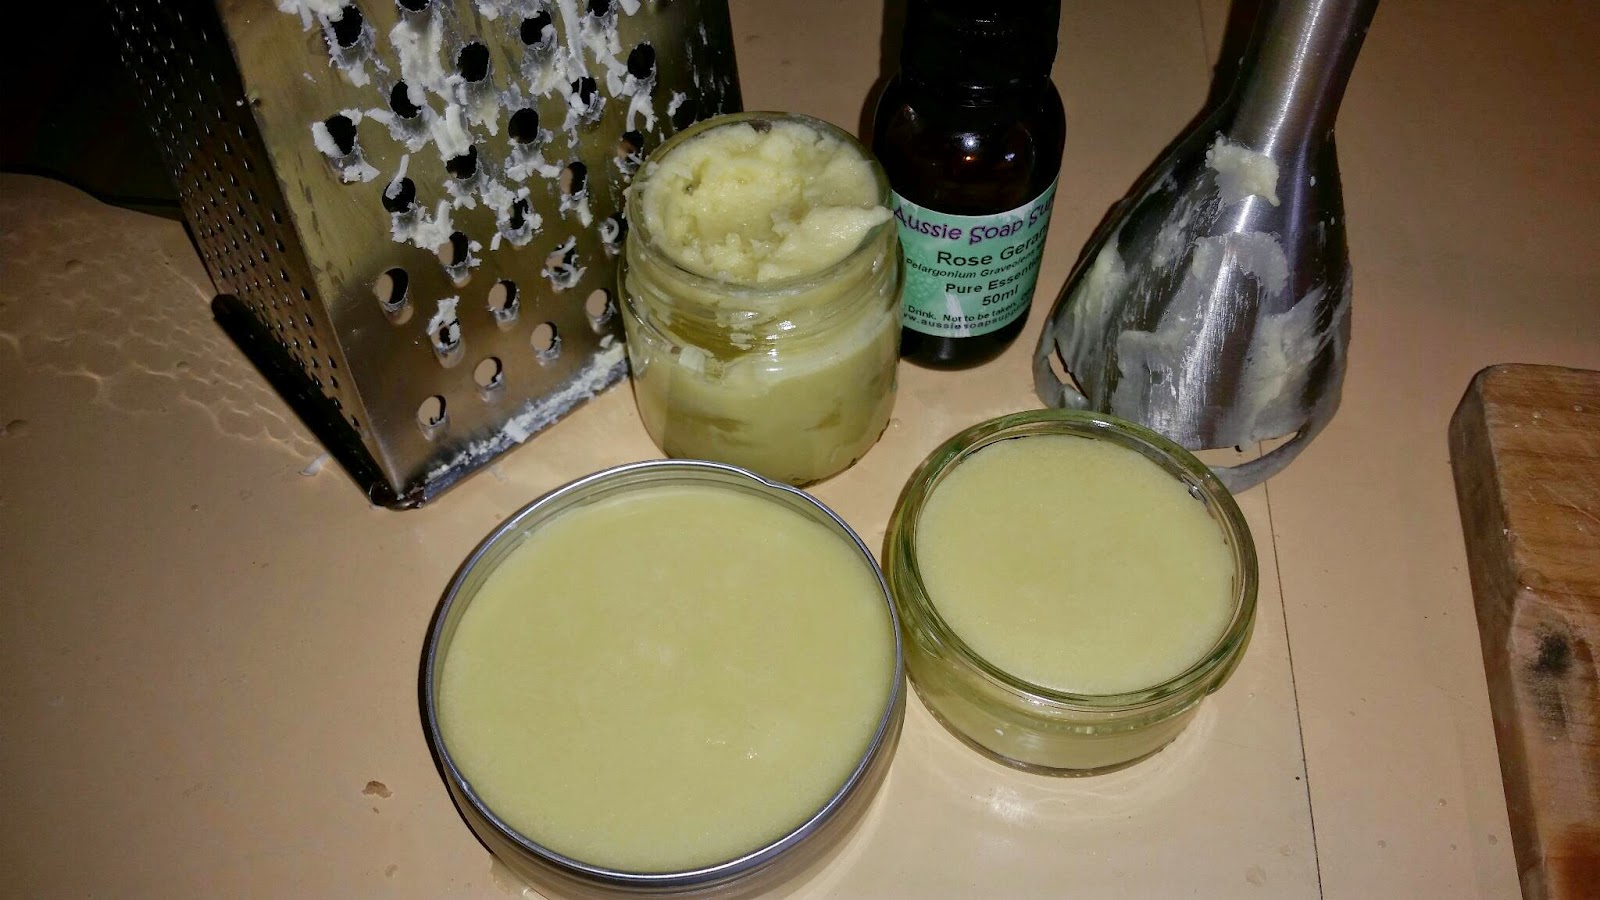
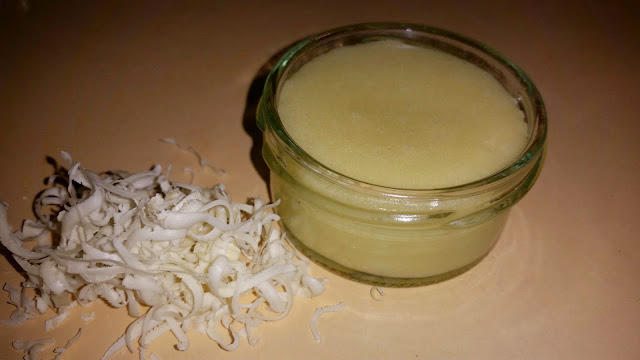
Saturday, September 27, 2014

Mulberry season!

Perth is a tough place to grow food. However, there are a few exceptions - sweet potato, olives and most fun of all, mulberries. Here in our suburb, there are several cracker mulberry trees right on the verge. Great big trees, great for climbing and getting mulberry stains on your school uniform. 

Luckily we often ride to school and we have been watching the fruit on our favorite tree getting plumper and darker over the last week or so. And now they are ready to pick!


We picked enough to take some home and put in a pie. Funny thing was we collected them in an unused doggy poo bag. That freaked me out a bit because from the outside of the bag it looked like we were the very responsible owner of some kind of massive great dane. 

Anyway, once home we whipped up this yummy pie: 
  • Short crust pastry: half a cup plain spelt flour/half a cup wholemeal flour or what every flour you prefer, a few tablespoonish scoops of butter. Rubbed in to the flour, add a tablespoon of sugar and a pinch of salt, add a little dash of water and a little dash of milk and combine with a butter knife. Not sure why we always use a butter knife to mix it, but my Granny said this was essential. Who am I to question her wisdom?
  • Mulberry mix: chuck in a good few handfuls of mulberries (no need to destalk), a peeled and grated granny (fruit, not the Grandparent), and a tablespoon of brown sugar - no water as the berries are full of juice. Let it reduce a bit. 
  • Roll out the pastry, put it in a greased pie dish and pour in the mulberry mix and bake, 180 degrees for 20 mins or so.
Vola! Great with whipped cream!


I just love making use of food that would otherwise go to waste. Mulberries are so sweet and fragile, they only last on the tree a day or two before they drop and are ruined. So while they are in season its great to take advantage of them. You can munch them straight from the tree or you can juice them. We also freeze them in containers to keep us going between seasons. People often ask how they can get berries plastic free - well this is the answer for Perth peeps! They are great on ice cream or in smoothies after they have been frozen. You can also make mulberry jam - but be warned they are very low in pectin so you will need to add heaps of lemon juice (which can effect the flavour) or add commercial jamsetta. 

Go forth with your doggy poo bag and enjoy the bonanza!

Thursday, September 4, 2014

Homemade yoghurt


We've been making our own yoghurt for a few years now and we're pretty happy with our method now. It's quick and easy once you get the hang of it. Here's how.

You'll need some starter (a few tablespoons of quality plain yoghurt) and milk. Don't buy expensive powdered starters, all you need is some yoghurt. Just don't use flavoured ones, use plain. We do ours in one litre batches but you can do less if you want. You'll also need a container to put the yoghurt in and an insulated container to fit that inside of. We use a 1L glass jar and an Easiyo maker or similar which the jar sits inside.


A 'pot watcher' also comes in handy. This is a glass disc which rattles when the milk is coming to a boil and avoids overflowing milk.


Firstly, bring the milk to a boil in a saucepan with pot watcher in. Turn it down and let in simmer boil for 5-10 minutes. This step is to reduce the milk a bit so you'll get nice thick greek style yoghurt without the need to add powdered milk. Turn off the heat and leave to cool. When the milk is cool enough to put your finger in and leave it in without burning (5-10 minutes) the milk is ready. Some people use thermometers for this but we've found the finger test works well and is simpler.


Boil the kettle while you're adding the milk to the yoghurt. To mix the two I use a licky spoon (a soft spatula). With the yoghurt in the bottom of the jar I add a little bit of milk at first (say 100ml) and stir it in well, then add another 400ml and stir again. Try to scrape around the jar to get all of the last brew mixed in. Then top up with the rest of the milk and stir well again. As soon as this is done put the lid on the jar and fill your container with the right amount of boiling water (enough to put the jar in without overflowing) and place your jar inside and put the lid on. There should be water up to the level of the yoghurt.


The photo above shows the 'false floor' of the container. This is what the jar sits on.

We usually leave this overnight, 8 hours plus is needed. If you open it up and it's still runny don't worry, just leave it another 4-8 hours and it should come good.


That's it, it's not too hard. Sure, you'll have failures but keep at it and you should be able to get it right every time. It's cheap and it's yum. If you want thicker yoghurt still (or a sour cream replacement) strain it through muslin for a few hours. And if you want sweeter yoghurt just add jam, honey, maple syrup, fruit, etc. This yoghurt costs the same as your milk, so for us it's about $1.30 a litre.

And it's thick!