The Fr8 has landed. It left Amsterdam, went to Cologne, back
to Amsterdam (more whores and coffee shops?), back to Cologne and on to Perth.
She's a beauty for sure, Quality with a capital Q (read Zen and the Art of
Motorcycle Maintenance for more on this). However, she's a bit on the heavy
side so all my dreams of riding it sans electric assist went out the door
pretty quickly. Maybe my legs aren't made of the right stuff, but in my defence
there are more hills here than in Holland, Amy insisted on electric assist and
we don't want it sitting in the garage like many a bike in Oz does. Here is
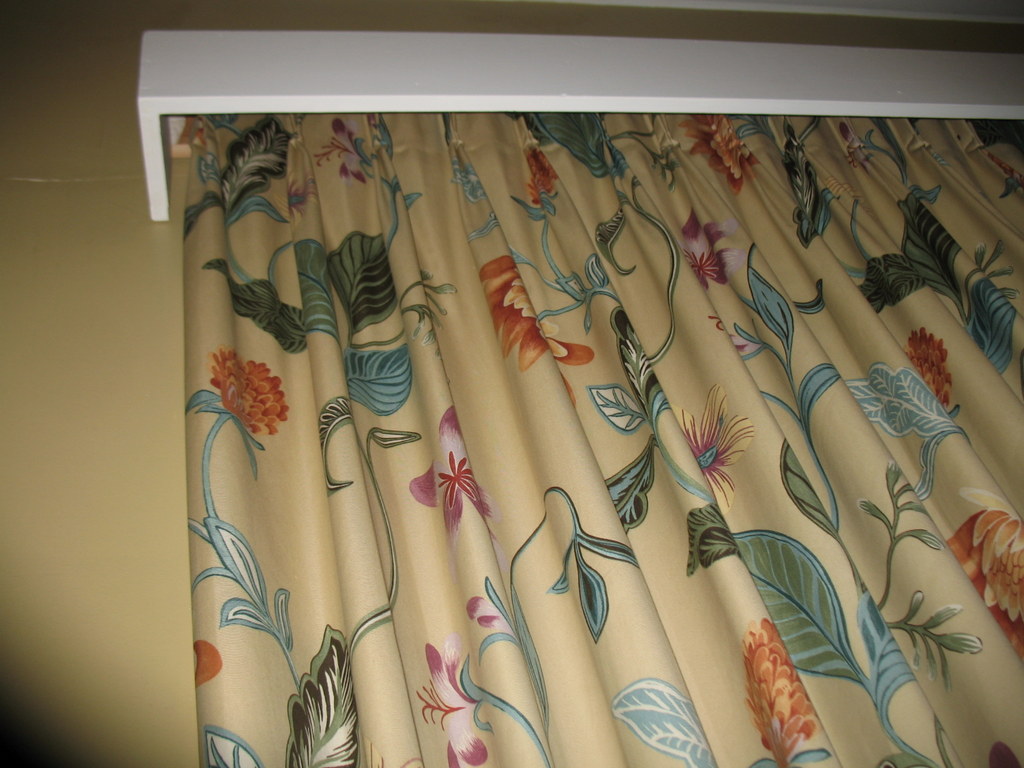
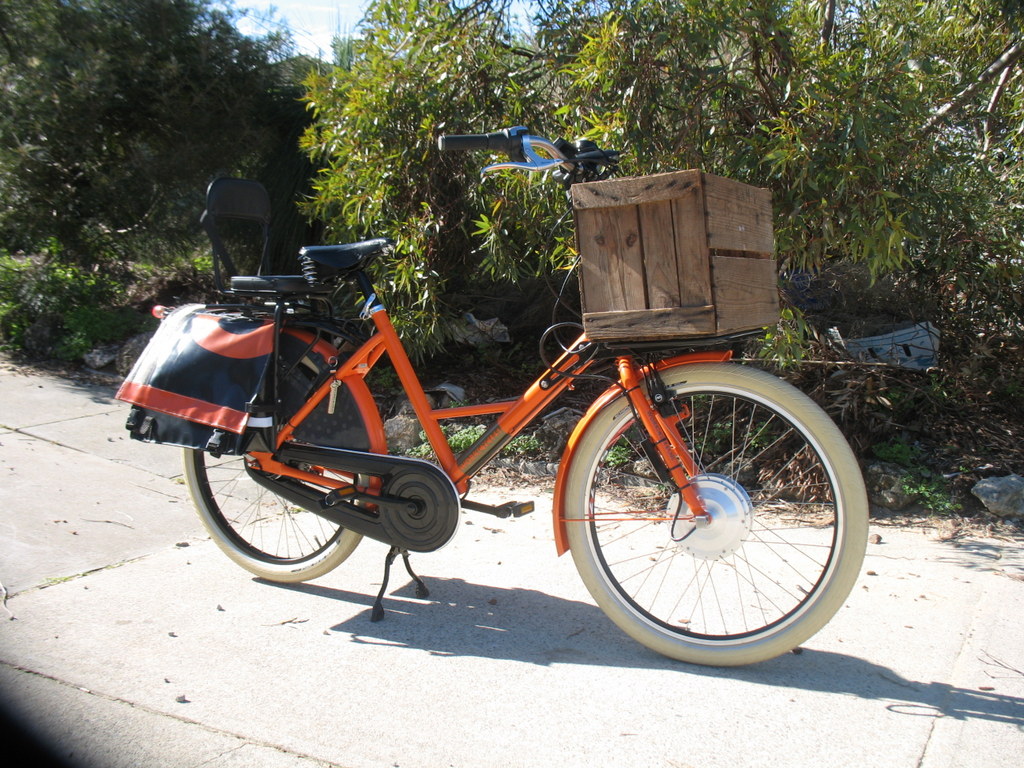
what she looks like (but a different colour).

The Fr8 is based on the old style baker's/butcher's/postie's
bike, so it's a cargo bike without the box (bak in bakfiets). It is a modular
bike, with many configurations depending on how you like it. Check out Workcycles for tonnes of info on this. If you have any questions go to the Bakfiets en Meer blog and ask Henry, he designs and builds the bikes and he actually spends the
time to answer people's questions (thanks Henry). If you're in Australia and want to buy one of these go to Dutch Cargo Bikes. So, here's how we converted
the bike.
Firstly the specs of this Fr8:
Fr8 NN8D Uni frame, with black city rack and rear rack
Shimano 8 speed Nexus internal hub gears
IM70 Roller brakes rear, Magura HS11 front (this is to allow
for the electric hub, which is not compatible with roller brakes)
Beautiful dutch orange colour (RAL 2004)
Brooks B67 saddle
White Big Apple tyres
GMG 911 child seat, with foot guards
Clarijs XLU recyled B panniers
Abus integral lock with 1m plug in chain
If you want to convert a Workcycles Fr8 you may be better
off ordering direct from Holland as we did. This is because things like Magura
hydraulic brakes are not standard, so if you get a regular Fr8 you will need to
buy rollers and remove them. This might not be a big deal if you can
resell/re-use the wheel though and ordering direct takes a while (13 weeks for
us!). Importing is also a hassle and may cost more too.
We decided to use the eZee 36V 14a conversion kit since it
seems to be one of the best, most common kits on the market. We got it from Glowworm Bicycles in Sydney, who gave great advice and service (thanks Maurice). We went
for the flat pack version, which comes with a rack and has a thinner battery
than the vertical. The first decision to make is where to install your battery.
I wanted to put it behind the seat post but there wasn't quite enough room. Another option was the panniers, but there's no way to lock your battery this way. The
rear rack was out of the question due to the child seat, so I opted for the
front rack. There are pros and cons to this, there's less wiring needed but it
means the front crate cannot easily be removed. If you decide to put it on the
rear rack then don't buy the Fr8 rack when you buy the bike, just get the rear
bumper and install the rack that comes with the eZee flat pack kit (but be
aware it won't take the weight of the sturdier Fr8 rack which can take 80 kg+).
The advantage of this option is that you can lock the battery to the rear rack
and it won't get pinched. Anyway, the next step is what kind of crate to put on
the front rack and I had a doozie lying around the shed. An old banana box we
got for free a few years back when we were buying Vacola preserving jars. It's
pretty rickety to say the least, but I think it suits the bike to a T so I
zipped a few screws in and it was ready. Like Jack Nicholson's football helmet
in Easy Rider it has it all, style, panache and utility…

Maurice suggested putting a false floor in the crate, which
is a great idea and worked well. Here's how I did it. Firstly I decided on how
to lay out the components, with the battery at the rear to allow for easy
access to the key hole and the controller at the front.

Then I screwed the
controller on to a piece of wood and attached this to the box to secure it (the
wood and controller are the same height as the battery so the false floor is
flat).


Then I drilled a hole for the key to go through (35mm drill bit) and
screwed a piece of wood in each corner so that the false floor could support
cargo weight. I left one piece of wood adjacent to the battery not attached to
the crate to allow for removal of the battery if needed. The wood wedges the
battery snugly all around so that it can't rattle around.

Next I got two U bolts
(14mm between the threads) and drilled holes through the bottom of the crate to
attach the crate to the rack firmly at the front.

This stops side to side
movement and anchors the crate really well, but I still put two cable ties at
the back to ensure no front to back movement (no room for U bolts there due to
battery). The last step was to put in the false floor. I bought an off cut of
3mm marine ply for $10 from a boat supply shop and cut it to fit the crate.
Three licks of varnish for weather resistance and in it went snug as a bug. I'm
still pondering whether and how to secure this. I need access to the battery to
charge it, so the options are to either leave the floor loose or screw it to
the bits of wood (need to unscrew every time you charge though) or cut out a
window with a hinge on to allow for access. The dilemma is that I don't want it
to be too hard to charge the battery but I don't want the battery to be
pinchable.

I got side tracked by the battery positioning, so rewind a
bit: the first thing I did was install the Ezee wheel. This contains the motor
inside the front hub. The hub fits a 10mm drop out and the Fr8 has 12mm drop
outs, so I used a hand file to file them down. It was actually quite easy to do
and only required removing the paint to fit nicely in.

I replaced the Marathon
plus tyre with the Big Apple to match the rear and adjusted the brakes for the
thinner rim. To install the nuts and bolts to the hub I'd recommend the Renaissance manual, it has a great explanation of how to do this (the kit doesn't come with
a manual unfortunately!).
Next I put the torque arms on. This stops the hub motor from
spinning inside the drop outs and is a really important part. It's pretty easy
to do, just follow the instructions from the Glowworm website (look under
E-bike parts and accessories, torque arm).

Then I fitted the LED display unit and cable router to the
handle bar and head set respectively. Next I put the motor cable harness junction box together and
installed it on the right fork (again, check the Glowworm E parts specific
descriptions for instructions). It has a loop at the bottom to try to prevent
any water from getting in to the motor. When you do this make sure you have
enough slack in the cable to allow for full lock on your wheel.

When you have this done you can install the throttle and
check that the wheel spins when you turn it. If it doesn't you may have a
problem, but don't worry you probably just forgot to plug something in to the
controller or to turn the key! To attach the throttle just remove your hand grip
(left usually) and put the eZee one on.
Lastly I installed the pedal sensor. This was the most
daunting bit for me since I'd never removed a crank before, plus I didn't have
the necessary tools. You may want to go to your local bike shop to get the
crank off and on again if you're not confident about doing it yourself. I asked
our bike mechanic mate Alex for a hand (thank you Alex, you're a star). He
expertly whipped off the left crank with a crank extractor and we fitted the
magnetic disc (make sure it is facing the right way by pedalling before you put
the crank back on). Normally you remove the bottom bracket cup and fit the
sensor behind the cup, but this wasn't possible with the Fr8 because the cup
was smaller than the ring of the sensor. We just decided to cut off the metal
ring attached to the sensor and cable tie the sensor directly onto the frame.
It looks a bit shonky but it does the trick. When you pedal the sensor sends a
signal to the controller to tell it to power up. Put the crank back on making
sure it's oriented the opposite way to the right pedal, unless you want to ride
like a Kangaroo!

Re lights, the Fr8 comes with Busch and Muller dynamo lights
run off a Shimano hub dynamo. The hub dynamo is not compatible with the front
wheel Ezee kit so I considered other options. The lights are well done on the
Fr8. For example the cable to the rear light runs through the frame and under
the rear mud guard, so I thought I'd leave them on. I've ordered a Nordlicht bottle
dynamo to run on the front wheel which will be compatible with the B & M
lights and should fit on the light bracket on the front left fork. I'll report
back on this when I get them. I ordered the dynamo through a great site called Dutch Bike Bits.
Phew, I think we're done. Please note that I am a DIY dunce
and would have paid someone to do this for me if I could have. Despite
reservations I plucked up the courage to do it myself and I'm glad I did. It
may not be the best job ever and it did take me about 10 hours plus, but I'm
chuffed with the end result. I don't think anyone else would care enough (or be
crazy and anally retentive enough!) to make the crate look so neat and cool. So
go on, do it yourself. When something goes wrong with it you're much more
likely to be able to fix it if you installed it. Just remember to take your
time to contemplate the job beforehand and if you get stuck just walk away and
have a think about it instead of plugging on and getting it wrong.
These are the tools you'll need for the job:
A clear head
Allen key set
Spanners: 19, 16, 15, 14, 10 and 8mm from memory (try not
use adjustables, they’re bad for your bolts).

Phillips head screw driver
Cordless drill if you're putting a wooden crate on
Cable ties (200mm by 4.8mm worked well for most, plus a few smaller ones)
Pliers
Time and patience
By the way, regulations in Australia are that an electric
bike's motor be no more than 200w, with no speed restriction. So, despite this
being a stupid law in that it restricts the appeal of e-bikes to many people
(keeping more cars on the road), the eZee kit has a 200w motor. This may change
to match the EU's 250w limit, but I wouldn't bet on it.
That's it for now. I've ridden it a bit and it works a treat
but I'll leave the review to another post. Now I just have to get that bloody
Oasis song Married With Children out of my head!
"She's electric, she's
got a family full of eccentrics"...
See part 2 here for the rest of the conversion.